How to design a conversational flow with Bot Designer?
This article describes how to create a conversational flow in Bot Designer
What is Bot Designer?
The Bot Designer interface allows you to create bots and manage your conversations using flowcharts that shape interactions with your customers. By accessing Menu > Chatbots, you can choose which chatbot to use for creating your conversational flow. Note that the Multibot functionality allows for multiple specialized chatbots on different topics (see the Annex section at the end of the article).
Here are some features of the new interface that enhance your experience designing conversations on the platform:
- Visual and collaborative interface ⚡
Quickly create your bot and automate complex interactions through a flowchart interface. Collaborate synchronously with different team members on your bot.
- Artificial intelligence 🤖
The natural language processing AI engine assists in creating conversational flows to:
- Choose a response in cases with multiple valid responses (disambiguation).
- Provide response options when the bot doesn't understand the user's message.
- Real-time demo 📱
Test your conversation in real-time and make necessary changes before releasing the final version to your customers.
- Templates 💪
You can create your bot using templates provided by the platform.
Watch the following video for a demonstration of the Bot Designer interface.
Furthermore, in this article you will learn about the following topics:
- What are flows in Bot Designer?
- Main flow
- Disambiguation flow
- Flow when the bot doesn't understand
- Agent flow
- Notification flow
- Video call flow
- Other flows
- How do I design a flow?
Blocks and organization of the main flow and alternative flows:
- Bot response blocks
- User input blocks (natural language)
- Action blocks
- Condition blocks
- Recommendations
- Welcome message
- Additional considerations for Bot Designer
- Designer tools (map and zoom, center, full screen)
- Content search
- How do I test a flow?
- How do I publish a flow?
- How do I create a new chatbot?
Annex: Multibot and Master Bot in the Bot Designer interface
- What are flows in Bot Designer?
The chatbot will be responsible for responding to your users. To achieve this, you'll need to design the main flow: a diagram composed of different response blocks (texts, images, actions, and conditions) that shape the interaction with the user.
You can also design alternative flows, such as determining what the bot will say when it doesn't understand a user's message (if it hasn't been configured for that scenario).
Once you select the chatbot in which you want to create your conversational flow, you will see the following screen, highlighting two essential sections with a dropdown menu:

- Chatbot: You can navigate through different chatbots and select the one you want to work on for its configuration.
- Flow: Divides the conversation into different sections, allowing you to define actions based on the chosen flow. There are six flows:
a. Main: Displays the overall conversational flow to interact with the user based on the chatbot's purpose, such as product inquiries, after-sales support, customer service, online sales, regional bots, etc. This is the most important flow.
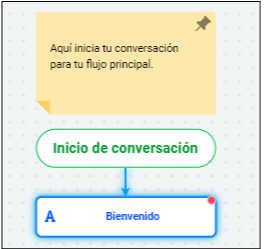
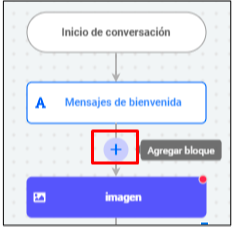
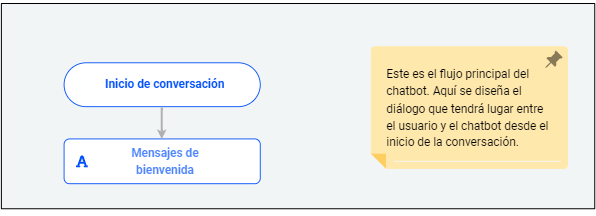
In the Main flow, you'll see the conversation starter box or text block:
The conversation starter and welcome blocks are predefined and cannot be deleted. As shown in the image, the Conversation Starter block marks the beginning of the main flow.
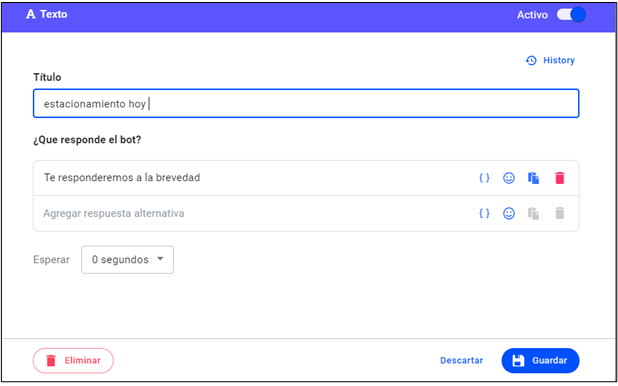
In the following image, you can see how the welcome message is configured. This message will be displayed to the user at the beginning of the conversation.
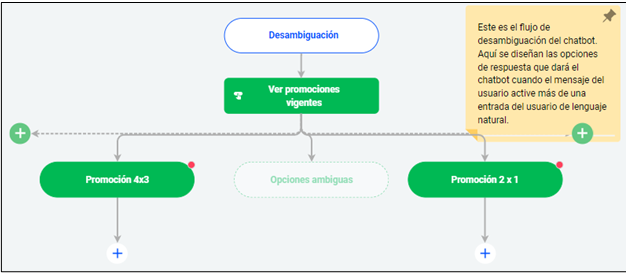
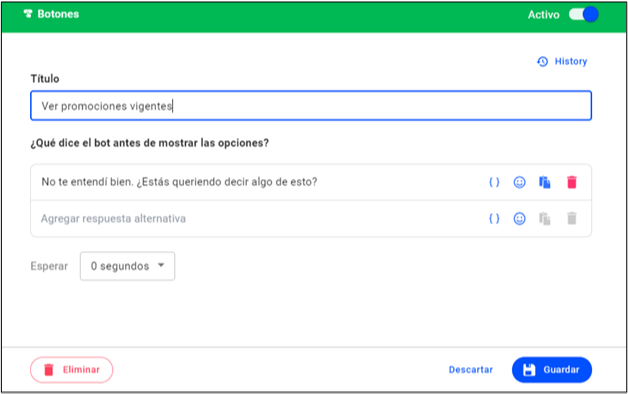
b. Disambiguation: allows for the design of response options that the chatbot will provide when a user's message triggers more than one natural language user entry.
c.When it does not understand: the flow will show a text block to configure the response the bot will give when it does not understand the user's message.
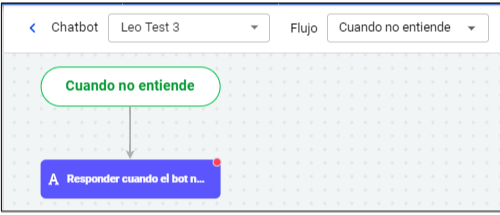
Watch the following video regarding the alternative flow that is activated when the user says something and the chatbot does not understand, as well as other additional flows available in the Bot Designer interface.
d. Agents, divided into:
- User waiting for attention
- No agents available
- User assigned to an agent
- Close conversation
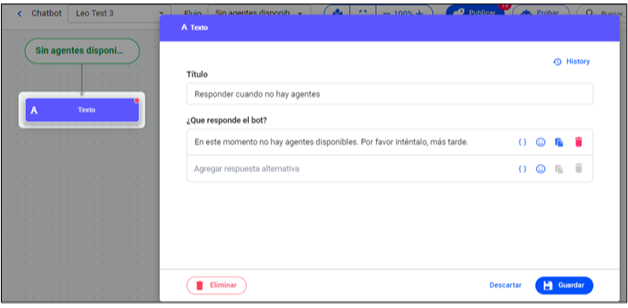
As an example, in the following screen, we select the no agents available flow and configure the following bot message:
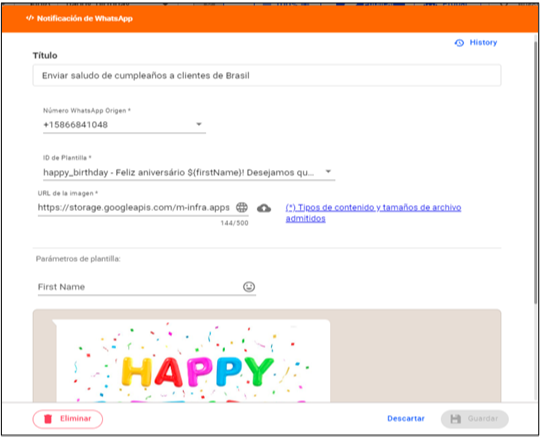
e. Notifications: activates the notification flow according to the notifications you have configured in the Notifications Engine (Menu > Notifications Engine > Campaigns and Notifications) and the WhatsApp templates (see the document for more details: How to create and send a WhatsApp template and optimize response times?) that are configured on the platform (Menu > Notifications Engine > Templates).
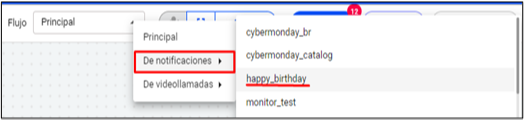
In the following image, we select happy_birthday as the notification.
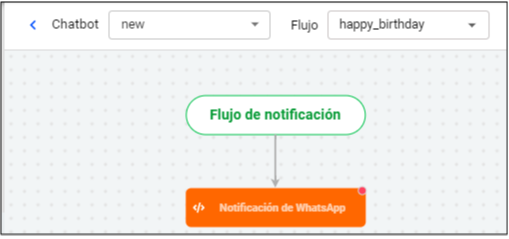
Bot designer will then allow for the addition of a specific notification related to the happy_birthday WhatsApp notification.
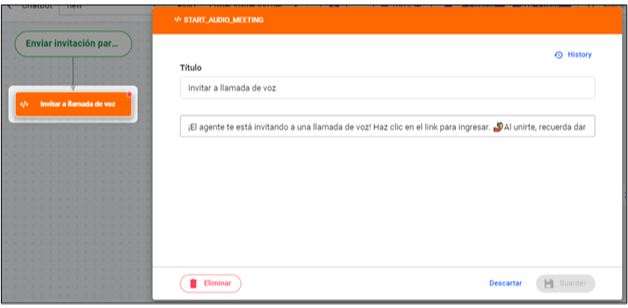
f. Video calls, divided into:
- Send invitation for video call
- Send invitation for voice call
- Send call completion message
The following screen shows a text block to send an invitation for a voice call:
g. Others: additional flows that are executed according to what you wish to configure, for example:
- Previous actions for each message received: this is what the bot always executes upon receiving a message.
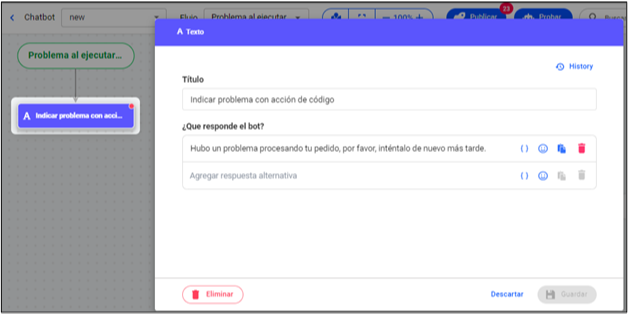
- Problems executing code actions: this is what the bot executes when an execution error occurs in a code action.
- The user has sent a location: this is what is executed when the user has sent a location.
- The user has sent a contact: this is what is executed when the user has sent a contact. The following screen shows a text block to indicate a problem with code actions.
Watch the following video message to learn more about how to create a navigational bot:
- How do I design a flow?
Text blocks:
The blocks/boxes are displayed graphically and are organized according to the selected flow: main, message when it understands, etc.
Important: Throughout the conversational flow, the green blocks are those that wait for user input, and the blue blocks are the bot's responses.
Organization of the main flow and alternative flows with user inputs and bot responses To create your conversational flow, you must select the necessary flows that will provide different blue blocks for text, images, and buttons for bot messages, and user interactions (green blocks). The main flow is the most relevant part of the conversation, but alternative flows share the same dynamic regarding the possibilities for inputs for interactions between the bot and the user. Thus, by clicking + on the diagram arrows, you can add different blocks.
Blocks are divided into 4 groups:
a. Bot response blocks: These are the blue blocks. They include the following:
Text Audio Video File Sticker
b. User input blocks: These are the green blocks that refer to the data the bot requests from the user to carry out the interaction through natural language. They include the following:
Natural language Buttons List of options Form Carousel
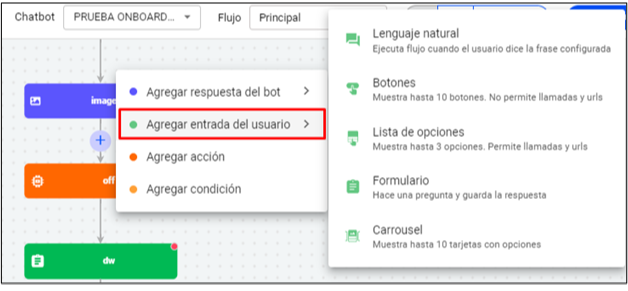
Watch the video below on how to add a user input (natural language block)
c. Action blocks: These are the orange blocks used to add a specific action. For example, the save history action within Conversations will save conversations in a specific variable. Another example is the go to action, which will direct to a part of the flow.
.
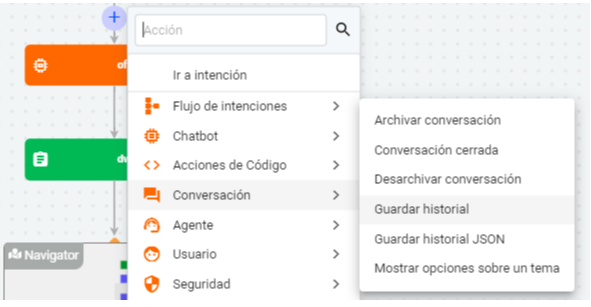
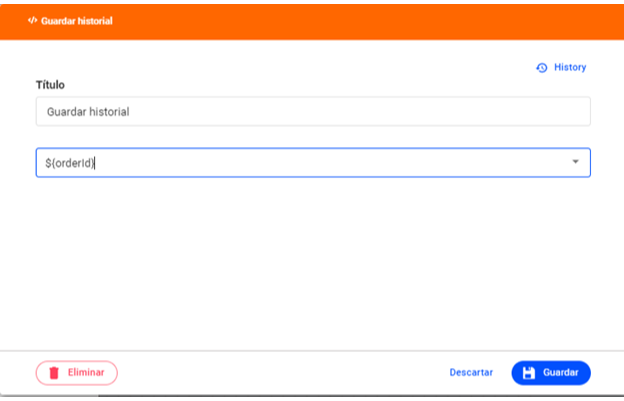
For more information on the main actions available on the platform, you can read the following article: How to respond with actions? Watch the video below on how to add actions to your conversation and how to transfer conversations to live chat agents.
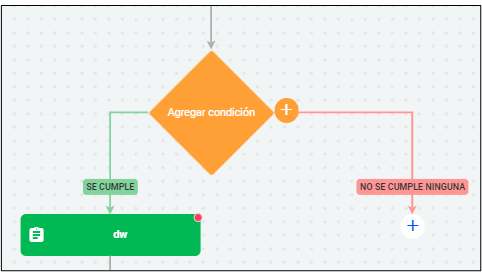
d. Condition blocks: these are the yellow blocks used to add a condition that triggers a specific response. Conditions have a name to define whether or not said condition is met. If it is met, one flow is executed. If it is not met, another is executed. For example, if the condition User language is Spanish is met, the bot will execute the conversational flow in Spanish. If that condition is not met, a different flow will be executed according to your configuration needs.
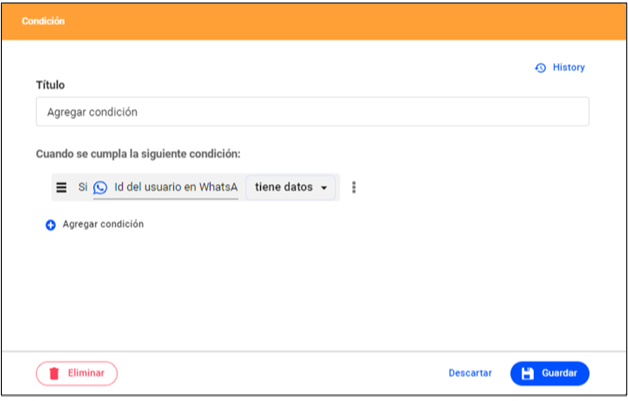
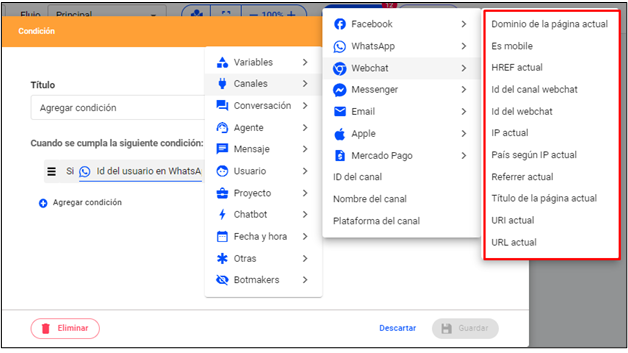
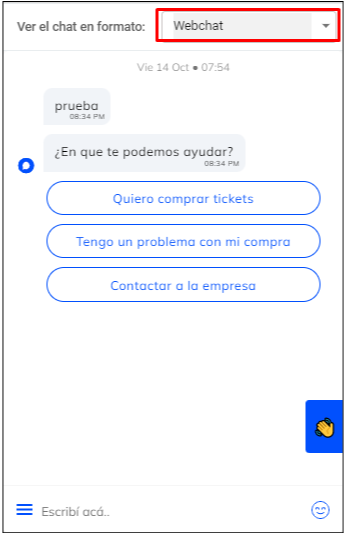
Note: To add conditions, there are categories displayed in the image below. Each category includes different options that allow for data configuration. For example, in Channels > Webchat, the options shown in the image within the red box are available.
Regarding the main variables, you can consult the following article: Platform variables.
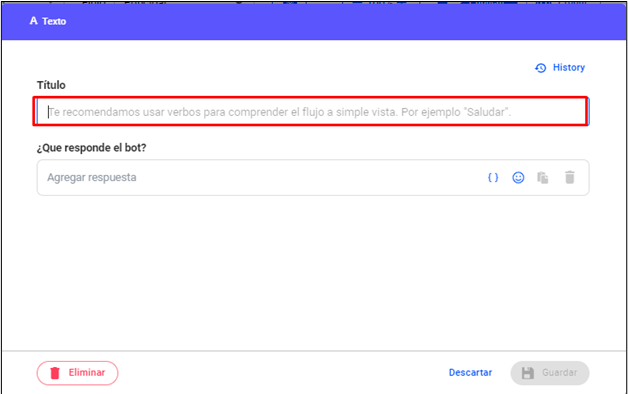
e. Recommendations
When designing the conversational flow, it is convenient to use verbs in the titles: Example: Welcome / Show food menu, etc. In this way, you can better identify the flow as a whole.
f. Welcome message
It is part of the main flow and is the message that will be shown to the user upon starting the conversation.
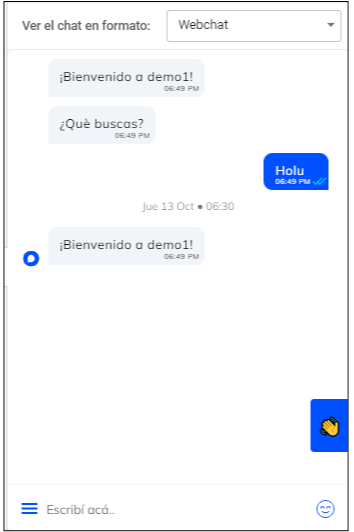
Considerations for advanced configuration of the welcome message
The advanced configuration section allows for the inclusion of keywords or phrases that will trigger the message flow, as they will be recognized by the bot. Additionally, you can include variations of these words so that the bot interprets them and activates the corresponding messages. Thus, there are different groups with different variations, and you can select the ones you want.

For example, if the user types the word “holu” by mistake, the bot will interpret that they meant to say “hola” and, therefore, will trigger the corresponding messages configured in the welcome message.
g. Additional considerations for Bot Designer
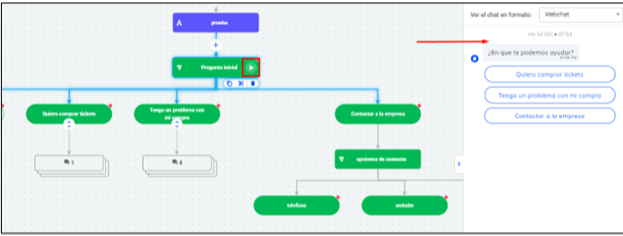
Play in text boxes The interface features a play function in any text box. By pressing the icon, it will execute from that box downwards. You can view the organization of the conversation on the right side of the screen, as shown in the following image:
- Trigger: it is a phrase that will trigger a specific action or response; in other words, it is the phrase that determines the behavior of the chatbot. Once activated, texts, buttons, images are shown, or a specific action is requested from the user. For example, the trigger “Hello” will execute the start of the conversation.
h. Designer tools
The Bot Designer interface has interactive tools to further facilitate the design of chatbots.
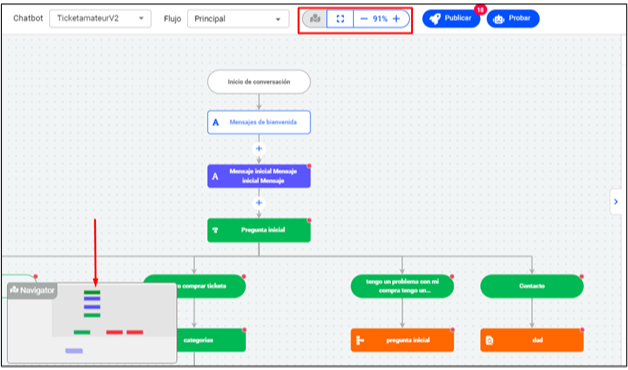
Map and zoom
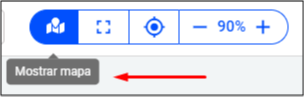
The map allows you to visually locate yourself within the configuration screen by clicking the show map icon. The zoom, located on the left, allows you to zoom in and zoom out so as not to lose sight of the conversation design. When zooming out significantly, the map appears automatically.
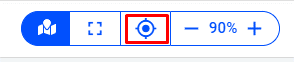
- Center
By clicking the circular icon, you can quickly view the conversational flow in the center of the screen.
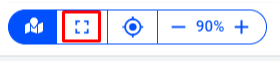
- Full Screen
By clicking the square, you will view the conversation in full-screen mode.
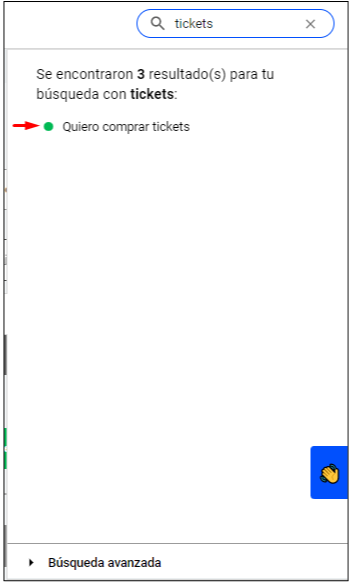
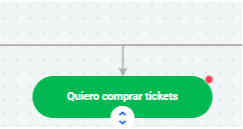
i. Content search
A term search can be performed so that blocks related to that term appear. In the screen below, we searched for the term tickets, and one result was found.
- How do I test a flow?
On the right of the screen is the Test Chat, which allows you to test the conversational flow. By clicking the ! icon, you can test your chatbot at any time and from any part of the conversation. It can be viewed for different channels: Webchat, WhatsApp, etc.
- How do I publish a flow?
Once you have designed your conversation, by clicking Publish in the upper right corner of the screen, you can view the blocks to be published, as well as the type of block created, the author, and the date, the time of the last modification, and the history of the changes made. Upon publishing, the selected blocks will be visible to your users.


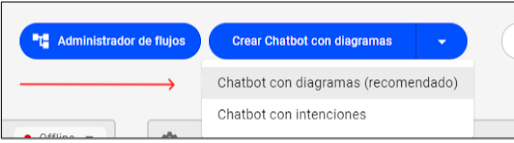
- How do I create a new chatbot?
By going to Menu > Chatbots, in addition to choosing which chatbot to create the conversational flow in (if you have one already created previously), it will be possible to create a chatbot from scratch or use the templates provided by Botmaker. Currently, there are templates available in Spanish, English, and Portuguese.
Once you select the type of chatbot, when hovering over it, the option to use a template or not will appear. In the example below, the creation of a chatbot using the Spanish Template is shown. By clicking Save, you will see the new chatbot you created with the selected template.
Annex: Multibot and Master Bot in the Bot Designer interface
By entering Menu > Chatbots, you can choose in which chatbot to create your conversational flow. Remember that the Multibot functionality allows you to have several chatbots specialized by topic and create those you require according to a specific need. You can consult more details here: Multibot: multiple bots to order and prioritize your conversations.
Likewise, the different chatbots you create can be managed from the flow administration tool or Master Bot. Access more details in the following document: What does Master Bot consist of?
Optimize the creation of your conversations
Bot Designer will take the organization of your conversations to another level through a more visual and intuitive interface, allowing you to make changes and configurations in a simple way.
Optimize the creation of your conversational flow with Bot Designer and easily modify it according to your needs!
Remember to visit our Help Center for further information.